
Pandalism
Felix DMR's Blog
Programming, Electronics, Autonomous Vehicles and other interests!
Copyright © 2023 Pandalism
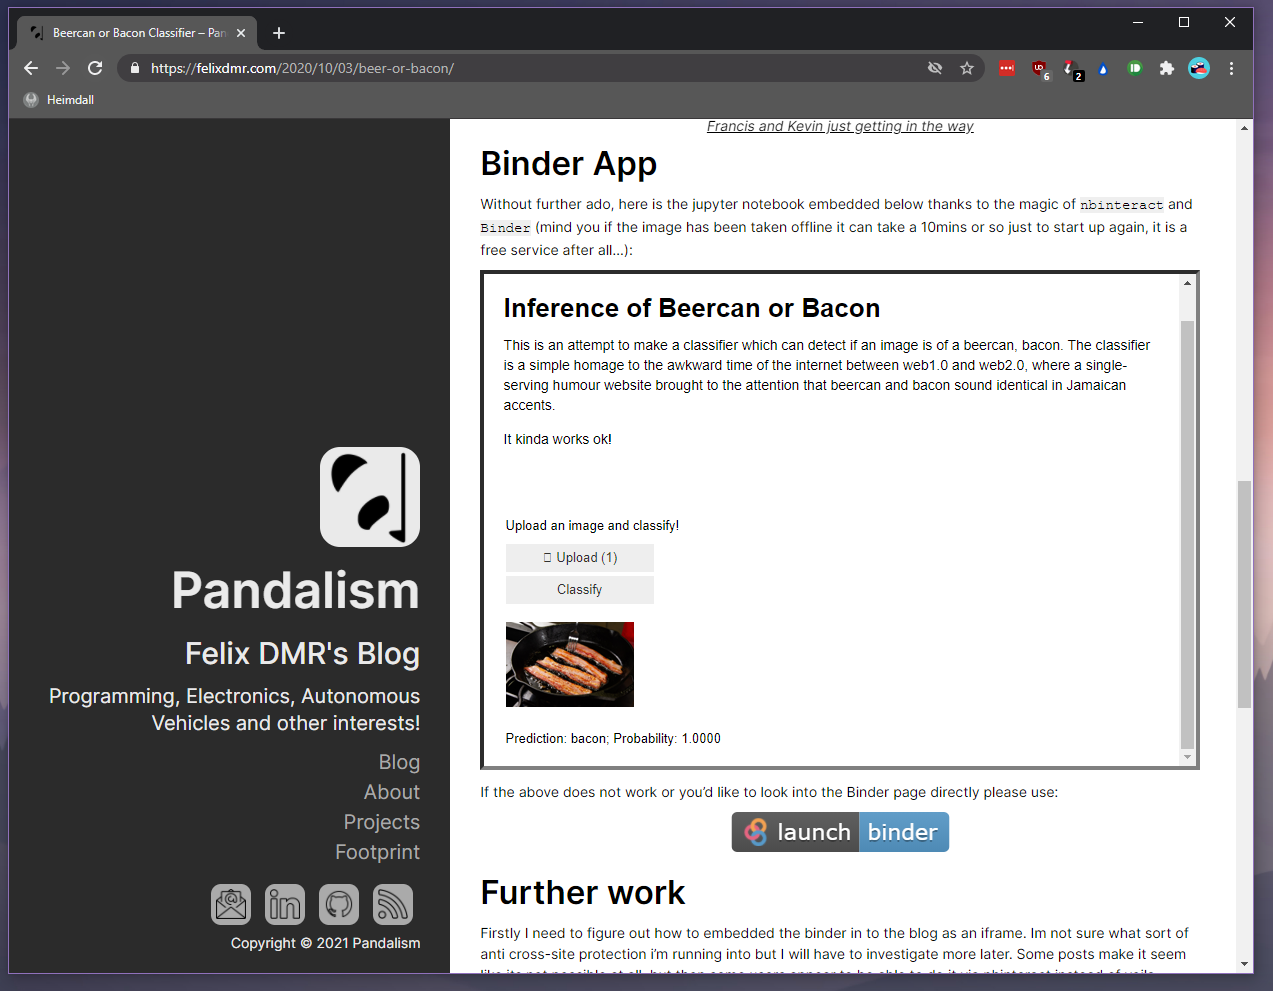
Tutorial: Embedding Fast.ai into your website through binder and nbinteract
Some time ago, as I was working through the fast.ai course, one of the mini-projects ended with a suggestion to serve the classifier to the general public.
The suggested route, being hosted on binder.org and serving the jupyter notebook directly or through voila, was quite good, and easy to do. Voila particularly made the page quite elegant and presentable.
However, the method did not play nice when embedding it in your own website. After pulling my hair out for a bit I finally got it working with nbinteract and thought I’d share the steps as a short tutorial for the rest of the world.
The issue with directly embedding
Assuming you have been following the fast.ai course. You now have a model, hosted on binder.org. Naively you might think that you can just embedded that output into an iframe tag and call it a day, however if we try that right here you can see the website is not displayed, whilst going directly to the website works totally fine:
The issue here is Cross-Origin protection mechanisms within both Jupyter and voila. The page service itself does not like to be serving for a given domain, but be displayed through another domain, in this case the fact that the Jupyter notebook is hosted and serving at https://binder.org is at odds with it then being also displayed within a page hosted at https://felixdmr.com. There’s some good security reasons for this but I will leave that to experts to explain. These security features are easily removed if you have full configuration control over Jupyter or voila, however even though binder.org allows some configuration to your hosted notebook, it seems to ignore these options. The following text saved as jupyter_config.json in the root folder worked fine for example:
{
  "VoilaConfiguration": {
    "theme": "dark"
  }
}
The easiest way around this is to just host your own Jupyter server on the same network/device as your website, but I use the built-in Jekyll functionality from Github for my website, so no dice.
nbinteract to the rescue
So Jupyter refuses to be embedded…this is where nbinteract comes in. Jupyter is really a webserver that serves a interactive webpage, the notebook, which it then connects to an interactive python kernel that it spawns and hosts. nbinteract is a pre-made static website with some JavaScript that connects to the interactive python kernel spawned and hosted on another server/service. The python kernel itself is connected via websockets and thus does not care what domain/server it is hosted on.
In practical terms, with a given notebook on a github repo, the nbinteract conversion process creates a binder.org hosted Jupyter instance, and static website which has the right widgets and display. When the website is loaded, the JavaScript will automatically trigger the Jupyter instance to load, and connect to the kernel it spawns, bypassing the usual Jupyter frontend.
The downside to this process is that its not a true notebook, any interactive processes need to be exposed by the JavaScript, and for now that is limited to ipywidget functionality. The upside is that that covers almost all your interactive needs and now you can serve the page from wherever you want, whilst binder.org hosts the instance.
Please excuse the terrible sketches. I will replace them when I get the time.
Converting the fast.ai app
For a generalised tutorial of how to use nbinteract I recommend this blog post.
If you apply the above directly to your app, it will appear to work, but won’t do anything when you click on “Show Widgets”. The reason for this is that nbinteract doesn’t properly recognise the fast.ai implementation of widgets. For it to work you need to replace it with ipywidgets. For the specific steps I did for my fast.ai app, keep reading.
I assume you have just finished the section on “deploying your app” in Chapter 2(or 30mins into the video lesson 3), you’ve gone through the challenges of getting the dependencies right and now have a working app on binder.
Modifying the notebook to use ipywidgets
First you have to make the key changes to the notebook itself for nbinteract to work correctly. In Paperspace or your local environment where you developed the app, navigate to the notebook in question.
- Replace
from fastai.vision.widgets import *withimport ipywidgets as widgets. - Go through the notebook and ensure all the widgets such are now prefixed with
widgets., for examplewidgets.FileUpload()andwidgets.VBox(). - next step add the markers to suppress notebook cell inputs and outputs as needed, with
# nbi:hide_inand# nbi:hide_outrespectively. I suppressed all the cells except for the output of the widgets, note that you won’t see the effect until its been processed bynbinteract - Save the notebook and upload it to the github repository which you are using for the binder app.
- Re-run the binder page to build with the new changes and make sure it still works correctly after changing the widgets (the jupyter notebook should work as per normal, with all cells visible).
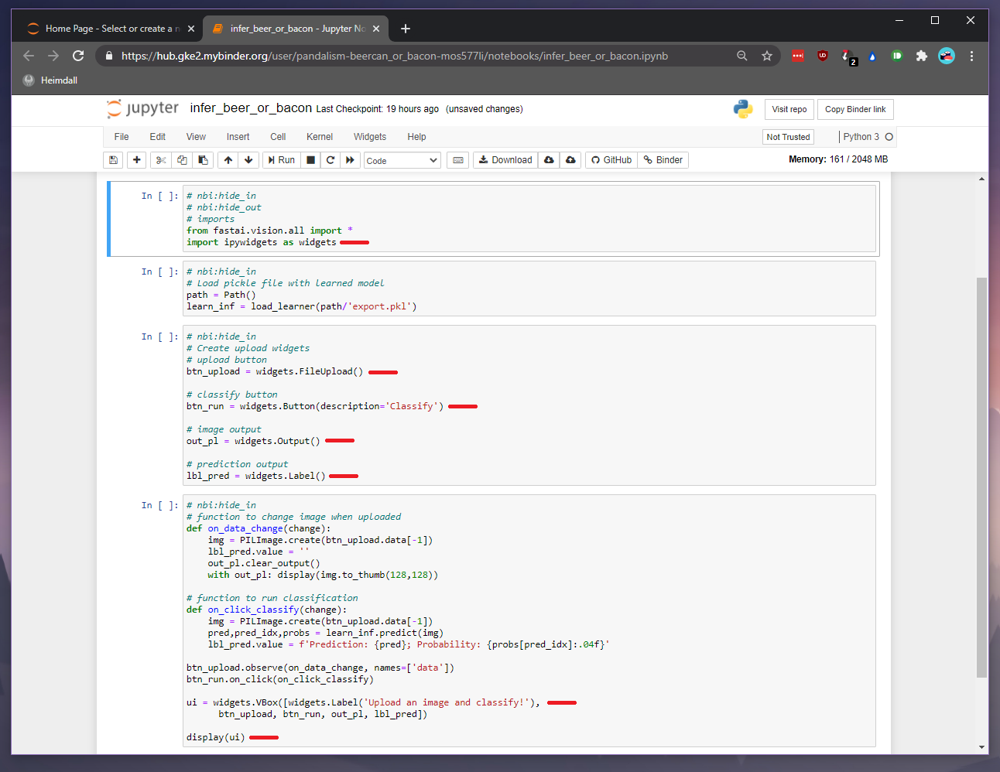 Here are the changes I needed to do
Creating the static html file to embed
For the following steps, I prefer to do it directly in the binder instance, as I can quickly change how it is displayed, but note that any changes are lost after the session.
- Navigate to the root of jupyter, by replacing the end of the url whether it be
/notebook/example.ipynbor/voila/render...ipynbwith/tree. - At the root, open a new terminal window
- In the terminal install nbinteract with
pip install nbinteract - Then run
nbinteract notebook.ipynb -s user/repo/branch, but using your values for the inference notebook and the github repo in which it is hosted. - You now have a html file with the same name at the root of the folder, download it and you can test it directly!
- If all is working, make any edits (I like to remove the top “show widgets” button) and place somewhere in your blog’s file-structure so you can embed it directly.
Easy!
Credit and links
- mybinder.org for the fantastic service (which I promise to one day selfhost and stop leaching from)
- nbinteract
- fast.ai
- Elc’s tutorial on using nbinteract

Copyright © 2023 Pandalism
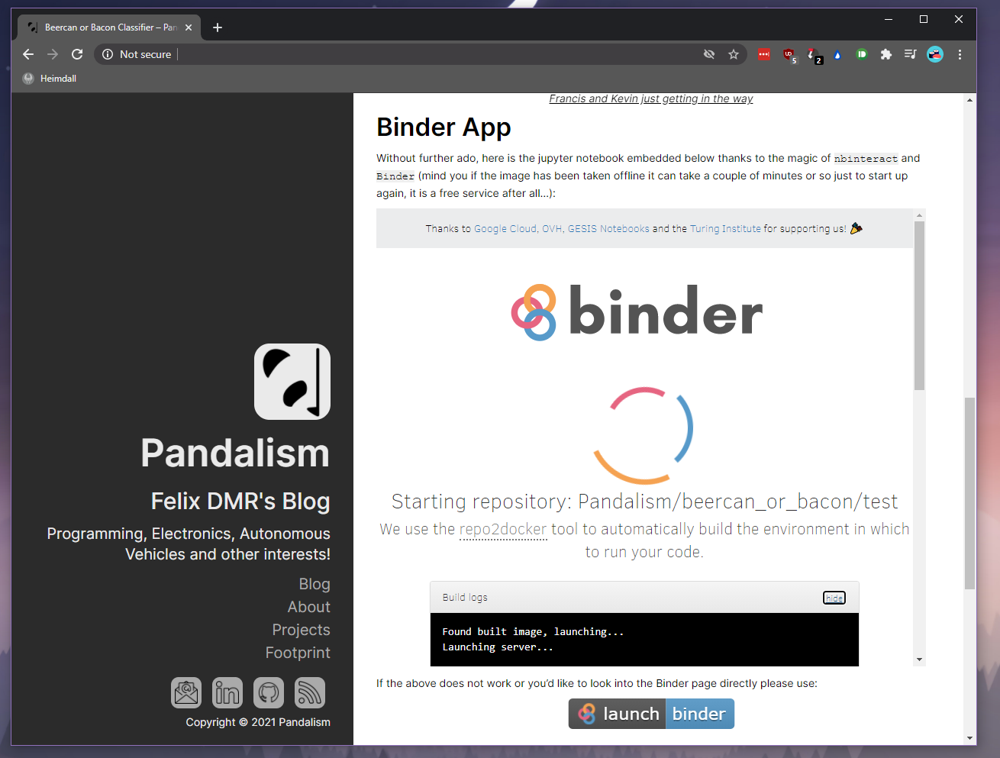 Initially it looks to work as the binder instance loads
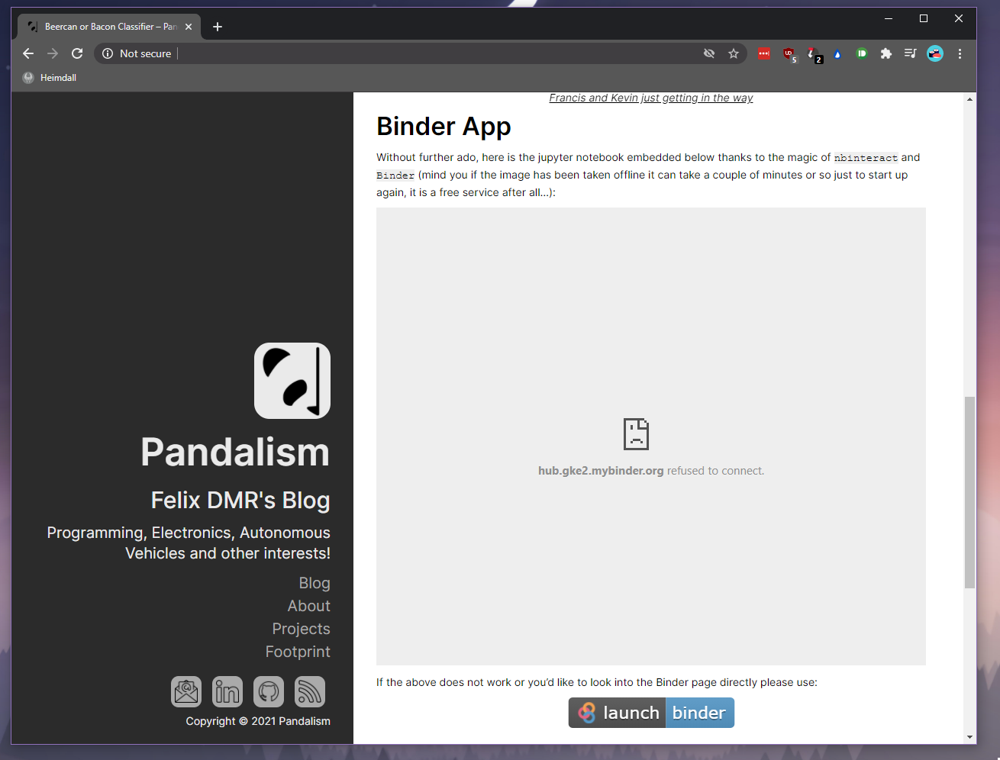 However when it switches to jupyter it refuses connection.
 As intended, if you click on the binder link, it takes you to the Jupyter notebook within the binder domain.
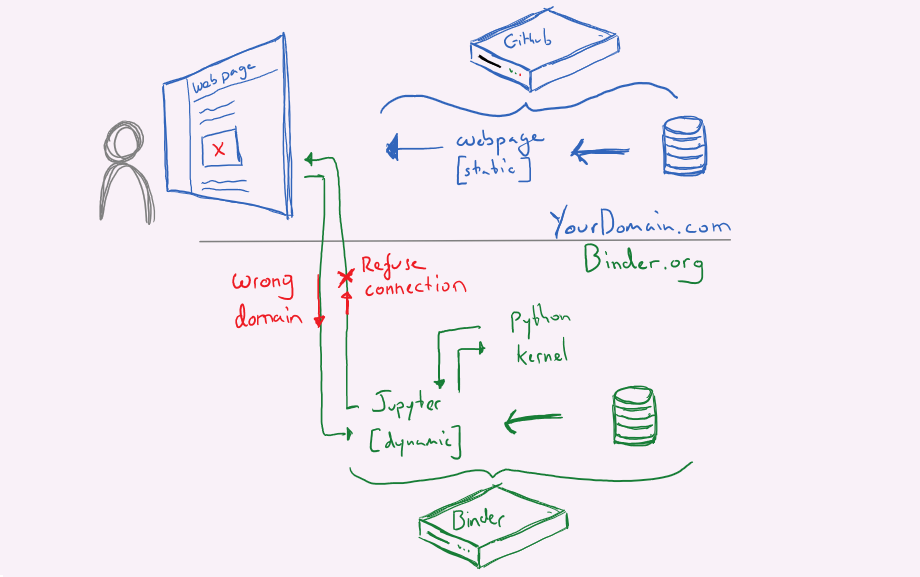 By passing the webpage as a `iframe` Jupyter sees the mismatch in domain and refuses the connection
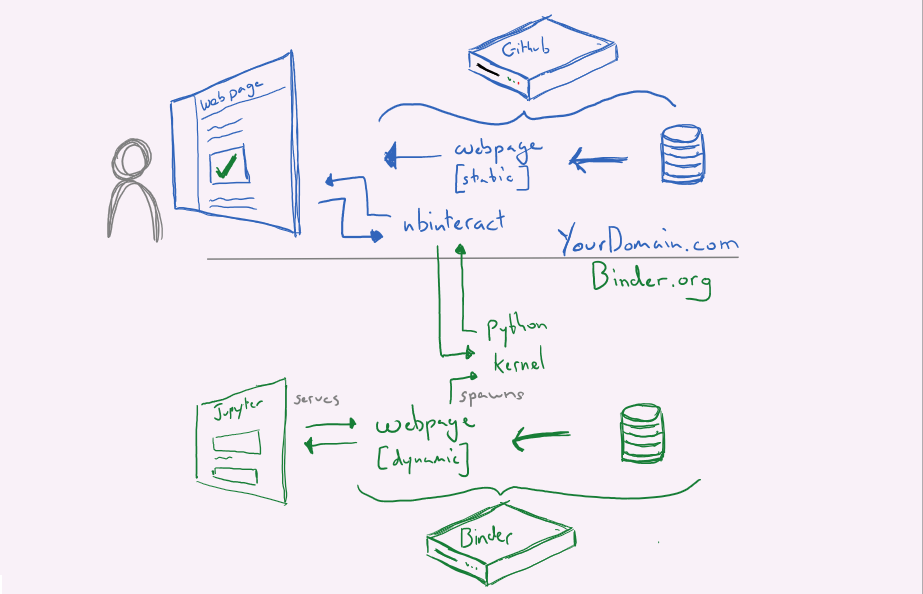 nbinteract simply bypasses the Jupyter service and connects to the python kernel it spawned.
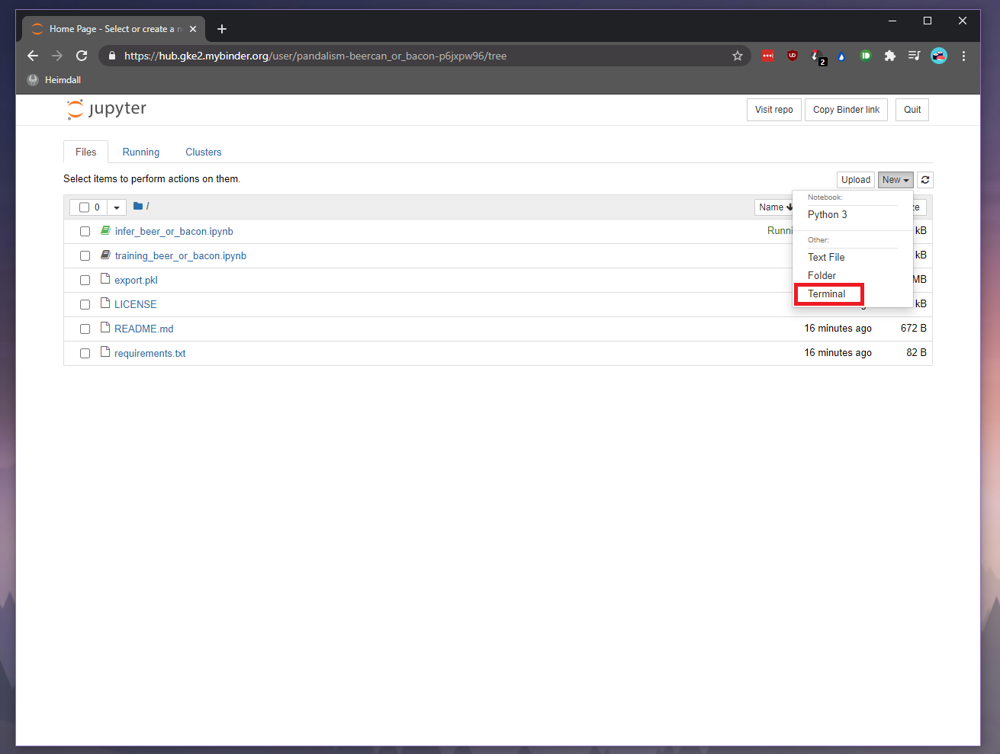 Open the terminal from the root folder
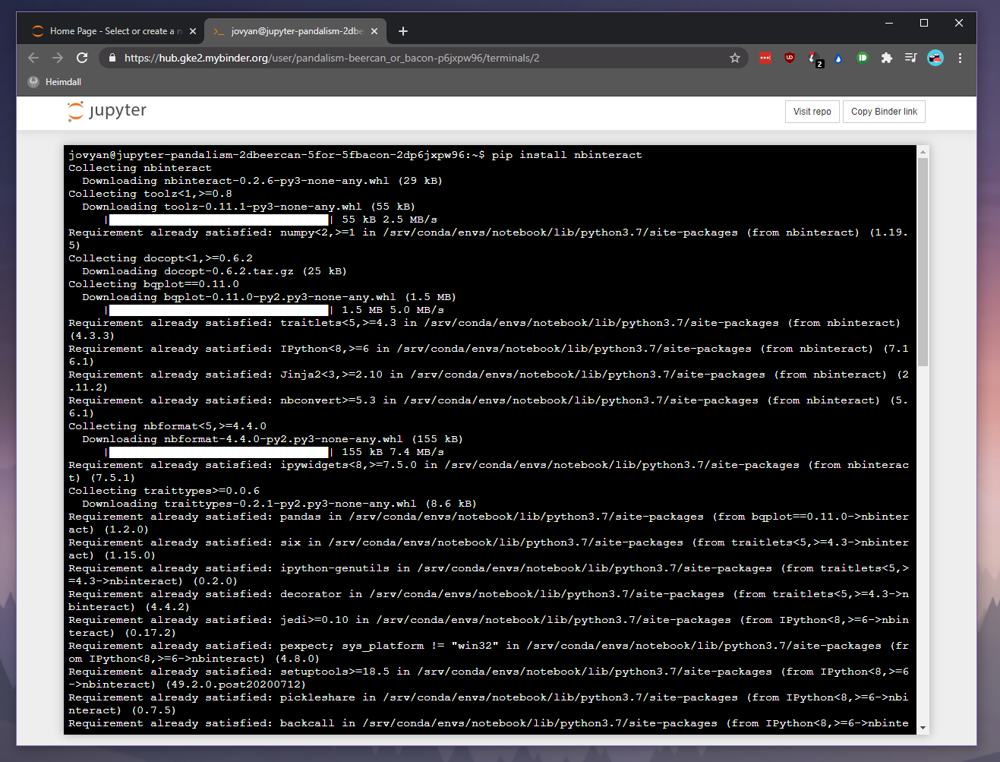 Install nbinteract
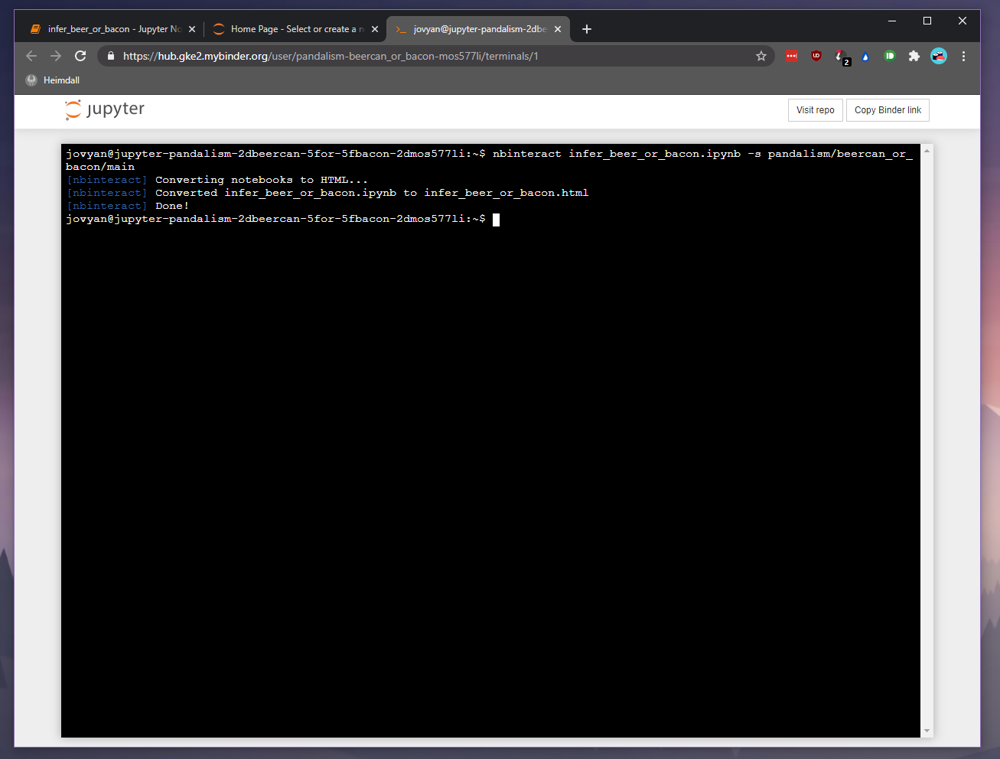 Convert the notebook
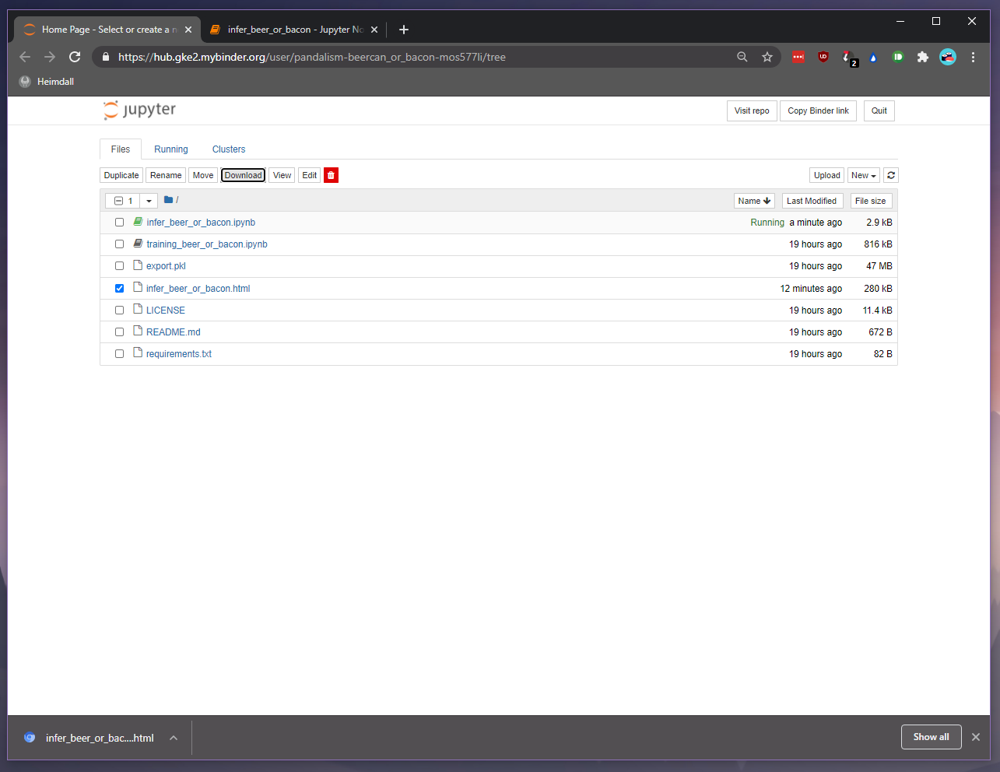 And download the html file to your local area
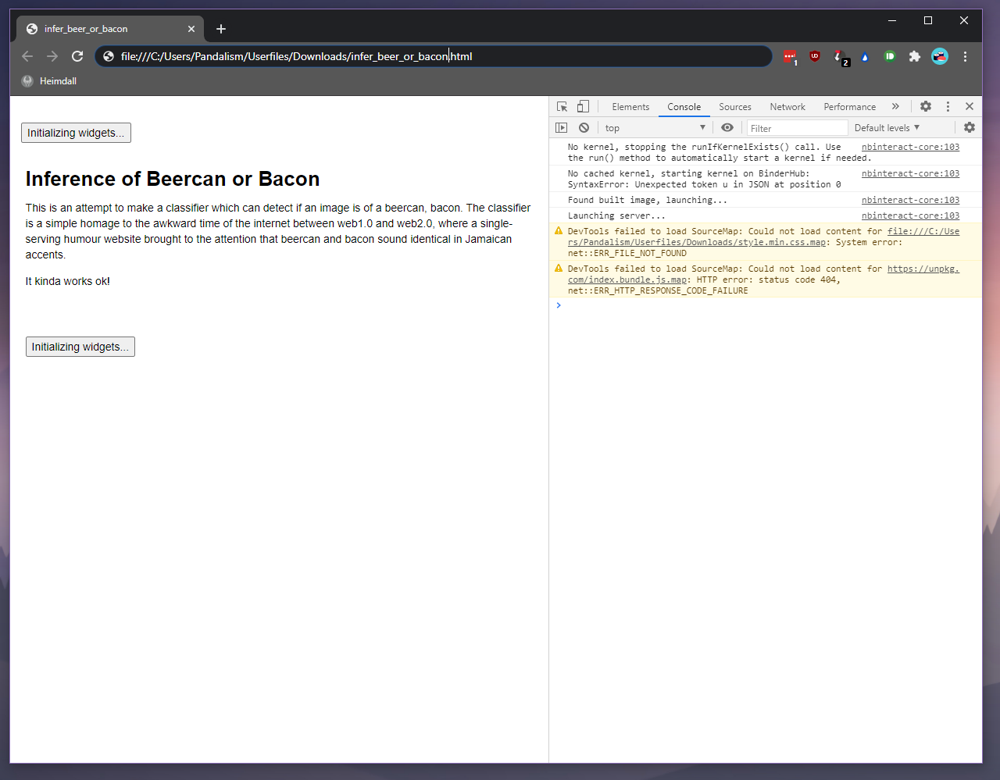 Opening the html locally and inspecting the JavaScript console, you can see it is working correctly and attempting to launch a binder instance
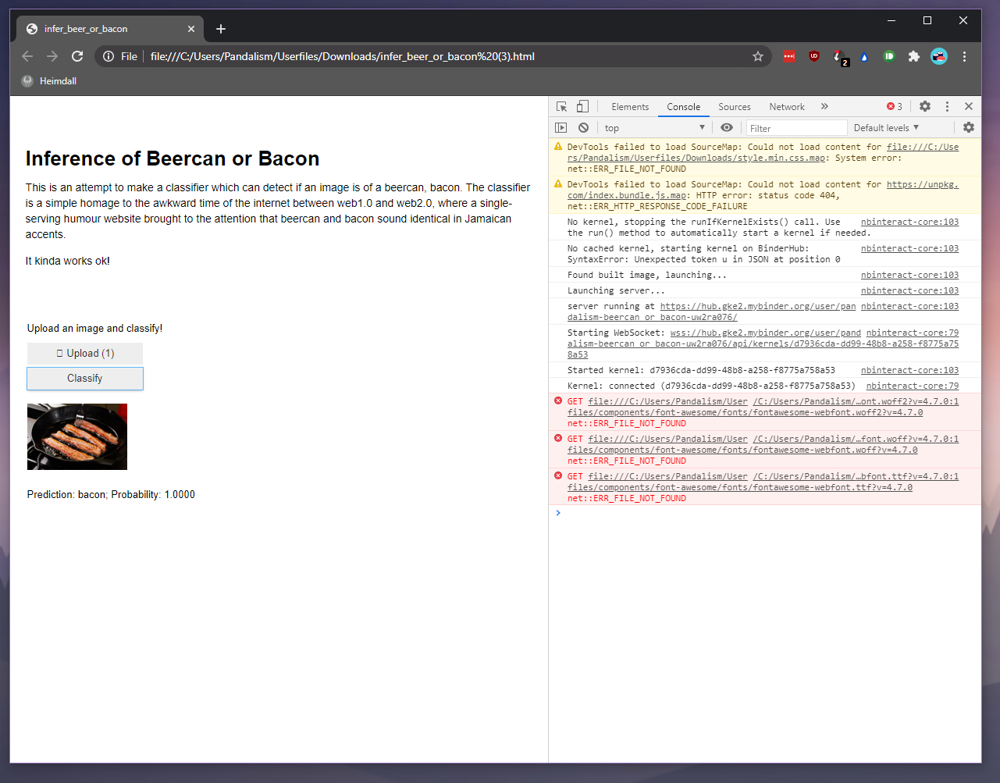 Once the kernel is loaded, the widgets should display, and you should be able to interact freely
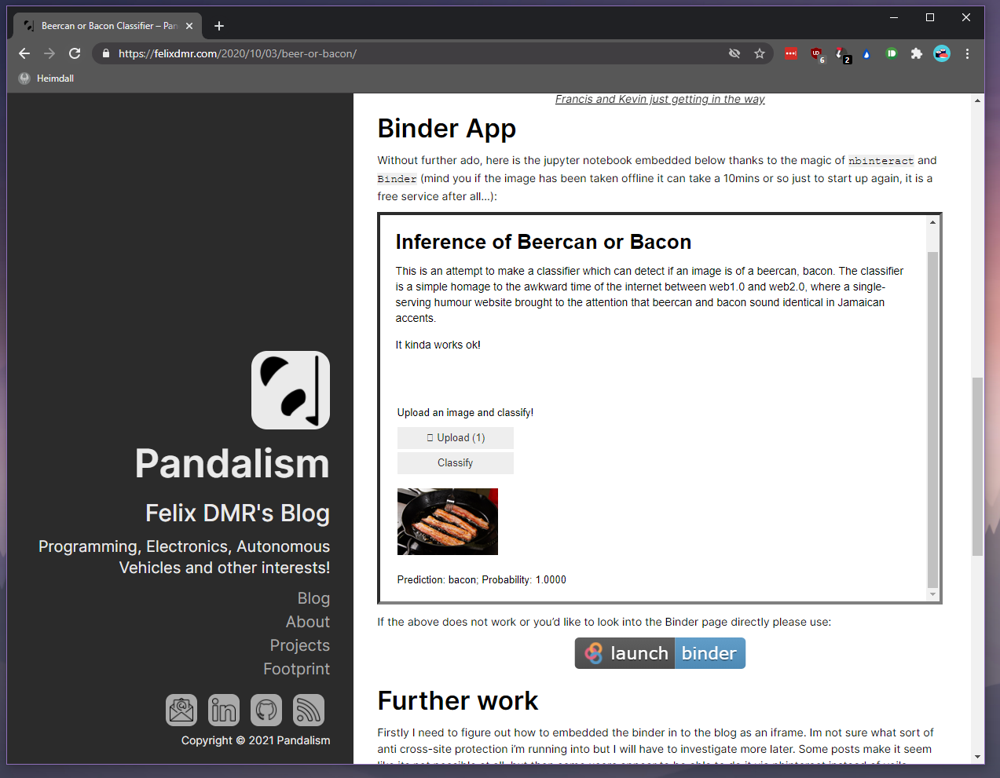 Happy with the results, modify the .html as need be and place inside your blog structure, embedding it via an iframe tag